Additive manufacturing · Graduate coursework, Spring 2025
DLP Printing of LLZO Scaffolds for Solid-State Batteries
- At a glance
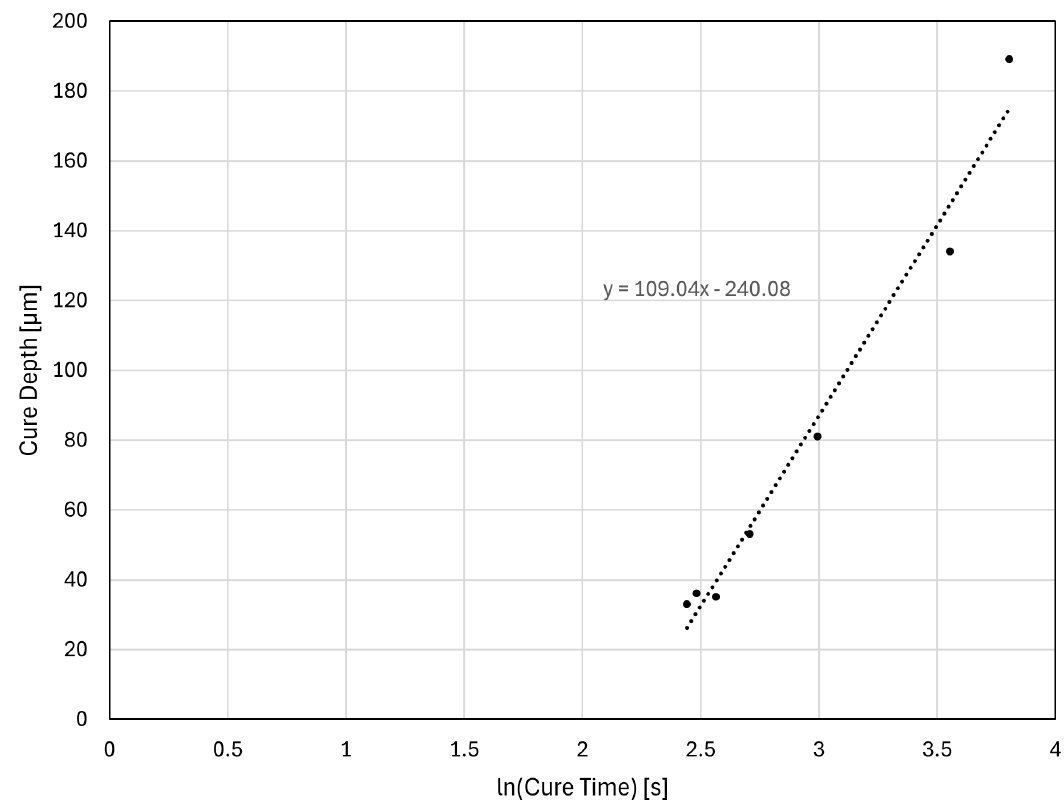
- Formulated an LLZO-loaded photopolymer resin, measured its cure depth (Dp = 109 µm), and found a 31 s exposure that resolved a honeycomb pore pattern in a single layer; full 3D scaffolds overcured because the ceramic particles scatter the projected light
- Methods
- Ceramic resin formulation, depth-of-cure characterization, DLP printing trials, honeycomb lattice design, data analysis
What?
Solid-state batteries replace the flammable liquid electrolyte of a lithium-ion cell with a solid one, which is safer and allows a lithium-metal anode for higher energy density. One common design uses the ceramic electrolyte LLZO (Li7La3Zr2O12) as a bilayer: a thin dense layer that separates the electrodes, on top of a porous LLZO scaffold that is filled with cathode material. These bilayers are usually tape cast, which leaves winding pores with bridges across them that are hard to fill with cathode slurry.
For a graduate course project (MSE 228, Additive Manufacturing, UC Berkeley), our team of four set out to print the bilayer by DLP vat photopolymerization instead, with straight vertical pores that cathode slurry can fill easily.
| Requirement | Target |
|---|---|
| Porosity | As close as possible to the theoretical maximum (about 91%) |
| Tortuosity | About 1 (straight pores) |
| Pore size | Slightly larger than the cathode particles (e.g. 12 µm for NMC) |
| Architecture | Bilayer: dense base as electrolyte, porous cathode scaffold above |
| Ionic conductivity | At least 3.15 × 10⁻⁵ S/cm |
Design targets for the scaffold
My part was the literature review, resin formulation, printing trials and data analysis.
How?
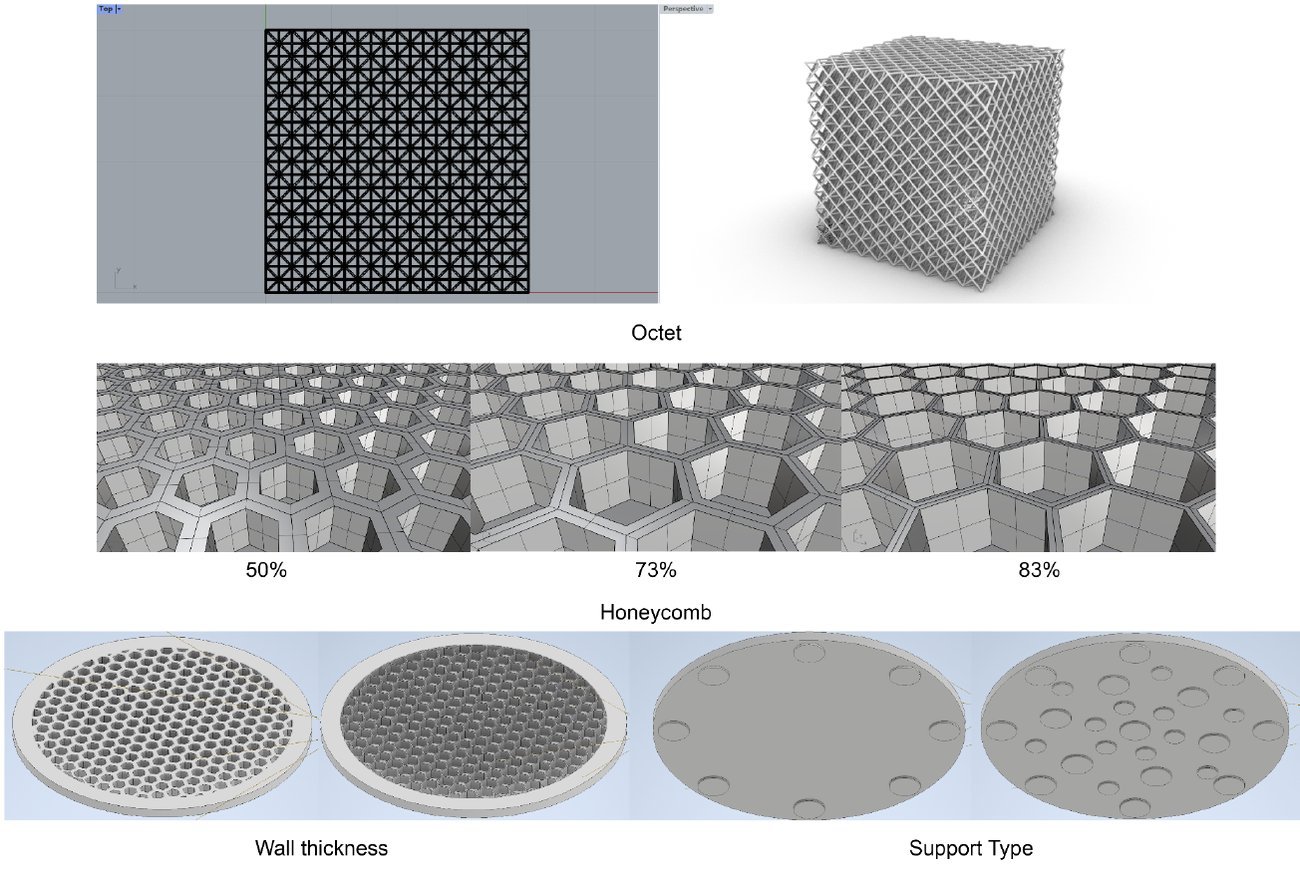
Design. The scaffold is a honeycomb of cylindrical pores on a solid disk, which forms the dense electrolyte layer. A circle inscribed in a hexagon covers π/(2√3), or about 91%, of its area, which sets the porosity limit. With a viscous, strongly scattering ceramic resin, about 75% is a more realistic target. Octet lattices were tried first and dropped because they printed poorly. Honeycombs at 50%, 73% and 83% porosity had features around 100 µm, too fine for our setup, so key features were enlarged to about 500 µm. Designs were sliced in Netfabb into 1280 × 800 pixel projection images at 427 DPI.
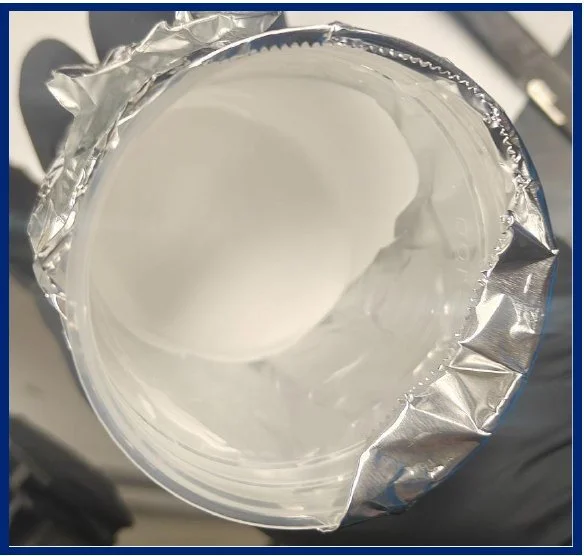
Resin. The first resin, 25 vol% LLZO powder in PEGDA 250 with 2 wt% Irgacure 819, ball-milled for an hour, did not print reliably and would not adhere to the build platform. LLZO can react with photoinitiators and reduce their effectiveness, so I reformulated with HDDA as the binder and Irgacure 1173 as the photoinitiator (25 vol% LLZO, 75 vol% HDDA, 2 wt% Irgacure 1173). Irgacure 1173 responds at 365 nm and is less prone to curing under ambient light, and the HDDA content was set to bring viscosity down: unlike ceramic-specific printers that spread each layer with a doctor blade, ours needed a low-viscosity resin. The revised resin was printed on a custom lab DLP printer with a 365 nm LED, onto a build platform pre-coated with a thin printed PEGDA layer to improve adhesion.
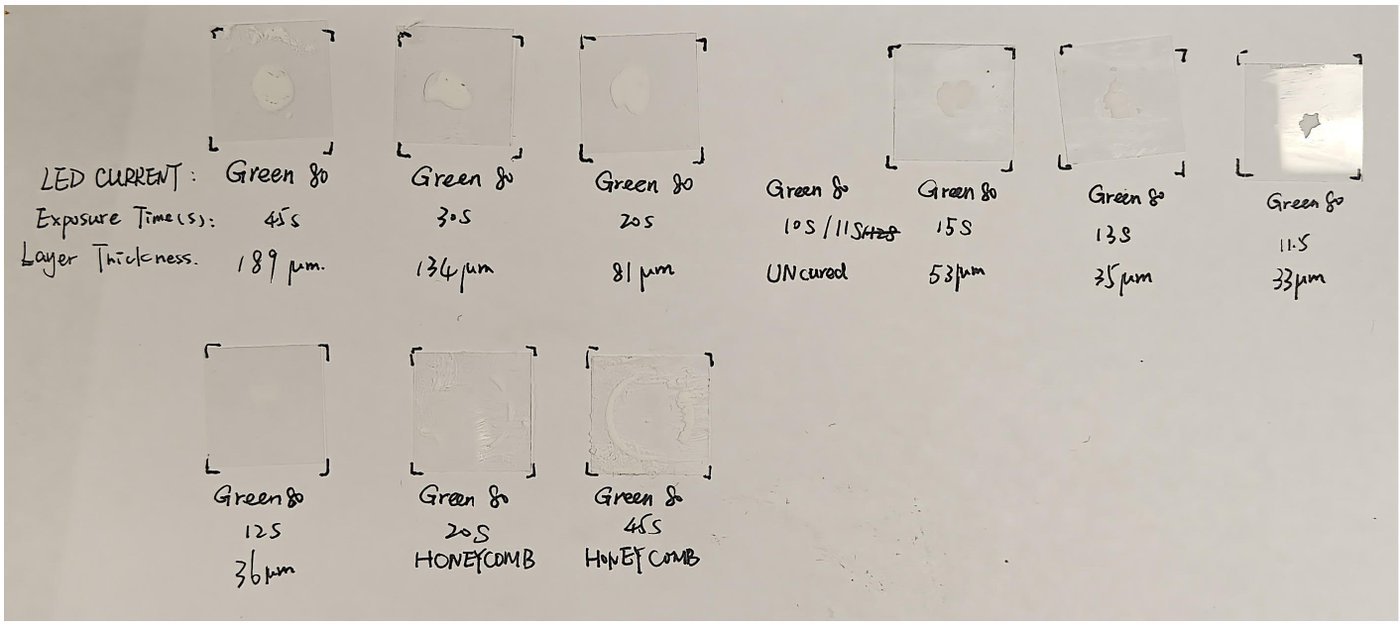
Cure depth. For each resin and printer, patches of resin on glass slides were cured at a series of exposure times and measured with a screw gauge. No power meter was available, so cure depth was fitted against the log of exposure time instead of energy, using Cd = Dp ln(t / tc), which yields the same penetration depth Dp.
Result
The final resin has a penetration depth of 109 µm. Patches exposed for 11 s or less did not cure, and exposures of 12, 20 and 45 s gave layers 36, 81 and 189 µm thick.
Projecting the honeycomb as a single layer showed that a 31 s exposure resolved the pores best. Printing the full 3D bilayer at that setting overcured badly: resin cured inside the pores and filled them. The LLZO particles scatter the projected light into regions that should stay dark, which blurs fine features.
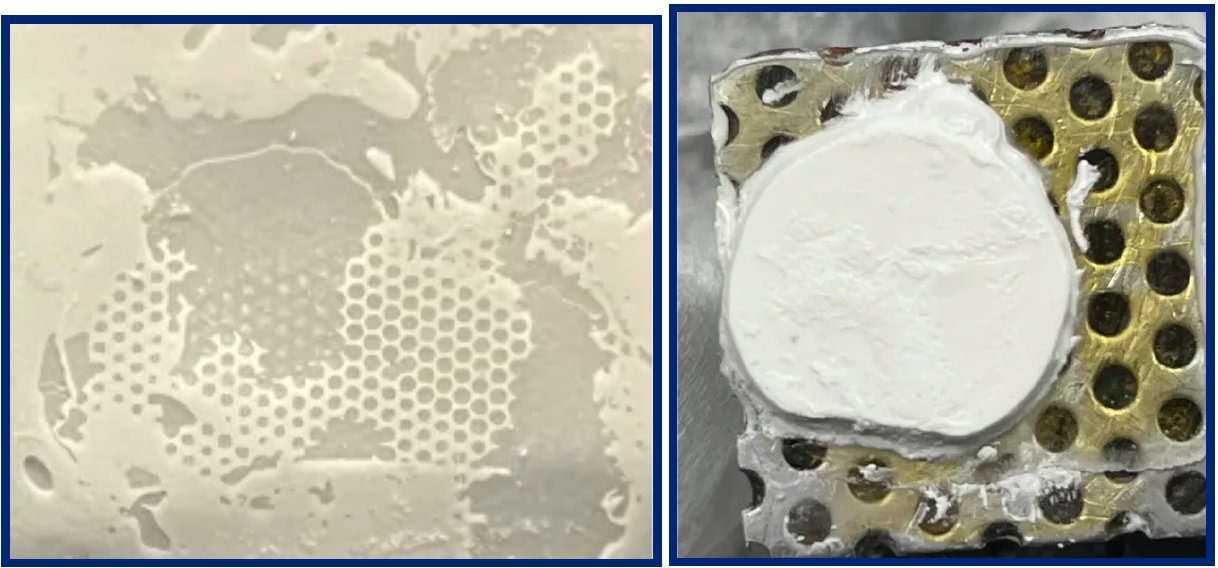
Two other limits stood out. The resin's LLZO loading was 25 vol%, below the roughly 40% used in published work, which would make sintering harder. The custom printer had no doctor blade, which made layer thickness hard to control. The planned next steps were to print each porosity, check porosity, tortuosity and slurry infiltration with micro-CT, and measure ionic conductivity and interfacial impedance with electrochemical impedance spectroscopy.
Team: Atulit Dasaratha, Mingjie Zheng, Peter Toma, Hank Liu.